
Work with Ticket Automations
Table of Contents
You can use Ticket Automations in Syncro to create robust helpdesk automations that automatically evaluate meaningful state changes to tickets, then apply updates in real-time over the lifetime of a ticket.
In ticket automations, actions you specify are automatically performed when certain conditions are met. You can add as many conditions and actions to ensure the automation behaves the way you want.
Examples of ticket automations include:
- If a ticket hasn’t been updated in four hours, send an alert via Slack.
- If a ticket status is “Waiting on the Customer” and you haven’t heard from them in 48 hours, send a reminder email and reset the clock to give them another 48 hours to respond.
- When a tech unassigns themselves from a ticket because they’re blocked or will be out of office for an extended period, evaluate the priority and any ticket tags to automatically re-assign to a another tech to pick up at their earliest convenience.
IMPORTANT: While most ticket automations will not run on tickets marked Resolved, real-time 'Ticket Status Changed' automations DO support the Resolved status. This allows you to execute critical final steps the second a ticket is closed, such as instantly sending CSAT surveys, clearing process-driven tags, or triggering follow-up workflows to ensure a consistent and professional end to every customer interaction.
You can read on, or watch this short video to learn more:
See also:
- Ticket Automations Reference for the full list of Conditions and Actions you can use in your automations.
- About Ticket Automation Types & When They Run for more information about how they work.
Create a New Ticket Automation
To create a new ticket automation, follow these steps:
- Navigate to Admin > Tickets - Ticket Automations. If available, a list of existing ticket automations appear in the Ticket Automations table.
- Click +New Ticket Automation.
- Supply an Automation Name you’ll recognize and potentially search by later.
- Set the Automation Type.
- In the CONDITIONS section, click the “+Add New Condition” link. Then use the dropdown menu to select a condition. Depending on the condition you select, additional information will be required.
- Repeat this step to add multiple conditions. For more information about available Conditions, see Ticket Automations Reference.
Note: When you add multiple conditions, ALL of the conditions will need to be met for the action to be executed. (There is currently no “or” option available.)
Tip: Click the trash icon to delete any Condition or Action you add by mistake. - In the RUN THE FOLLOWING ACTIONS FOR THE MATCHING TICKETS section, click the “+Add New Action” link. Then use the dropdown menu to select an action. Depending on the action you select, additional information will be required.
Tip: If your actions include emails, see the AVAILABLE TEMPLATE TAGS section to search for a list of add variables you can include: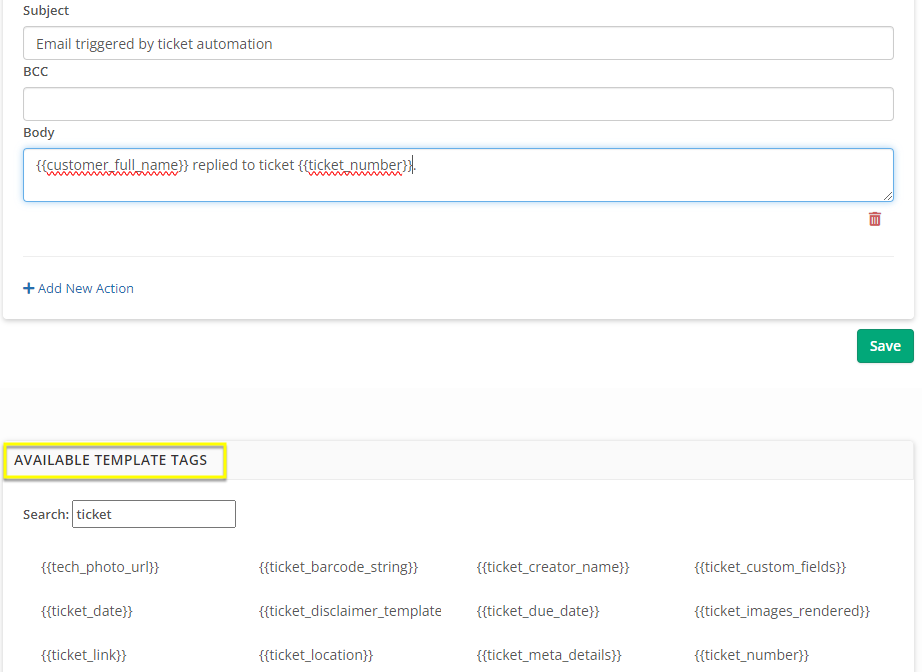
Repeat this step to add multiple actions. For more information about available Actions, see Ticket Automations Reference. (See also Work with Template Tags.)
Notes:- When you add multiple actions, ALL of the actions will be executed when the condition(s) are met.
- For Hourly automations, adding a public comment, private comment, or SMS action currently causes the automation to stop after 5 runs instead of 10, since these actions log two comments per run and runs are counted by comment count. See About Ticket Automation Types & When They Run for details.
- Click Save. The automation you created appears in the Ticket Automations table. It is set to Active.
Use the Ticket Automations Table
Once you have created Ticket Automations, they appear in the Ticket Automations table:

Locate a Specific Automation
If you have a long list, you can use the search box to quickly locate an automation. (Your search is limited to the selected subtab.)
Tip: The upper right corner of the table tells you how many ticket automations you have (for the selected subtab).
You can use the subtabs to filter the table based on what kind of automation it is:
- All Automations: Displays all of your automations in the table.
- Hourly: Filters the table to display only automations using the “Hourly” Automation Type.
- Ticket Created: Filters the table to display only automations using the “Ticket Created” Automation Type.
- Ticket Updated: Filters the table to display any automations triggered by an automation type whereby the ticket has been updated (i.e., Assignee/Priority/Status changed and Ticket Tag added).
Edit or Reorder Automations
Click the hyperlinked name of your automation to edit it.
You can also reorder ticket automations of the same type (i.e., Hourly or Ticket Creation) within their subtabs using the bento (6-dotted icon) that appears to the left of the automation name when you hover your mouse there.
Note: The order of automations is important when making bulk updates to tickets. See also: How Ticket Statuses Change.
Take Actions on Automations
For each automation currently displayed, there are specific actions you can take:
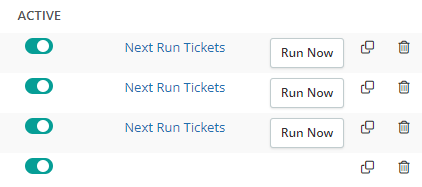
- Active: Click this toggle to quickly turn your automation off or on.
- “Next Run Tickets”: For "Hourly" automations only, click this link to preview which tickets this automation will affect. This can be useful in ensuring your ticket automation is set up correctly. If the result is nothing, that's often because there are no pending tickets matching the conditions of your automation. (It doesn't necessarily mean the automation is broken.)
- Run Now: For "Hourly" automations only, click to run the automation immediately. (We recommend you first click "Next Run Tickets” so it's clear what will happen when you run the automation.)
- Clone: Click the Clone (copy) icon to clone the automation. This creates a copy of the automation with the exact same name. Be sure to edit the copy to give it a meaningful Automation Name.
- Delete: Click the Delete (trash can) icon to delete the automation. Click OK to confirm.
See Completed Ticket Automations
You can see automations that have run for a specific ticket at the bottom of a specific ticket:

You’ll also be able to see a preview from the Tickets table. For more information, see About the Tickets Tab/Page.
Restore Deleted Ticket Automations
If you delete a ticket automation by mistake, you can recover it.
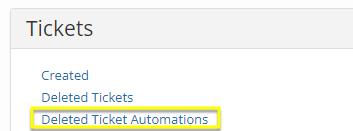
Navigate to Reports. Then in the Tickets section, click the “Deleted Ticket Automations” link:
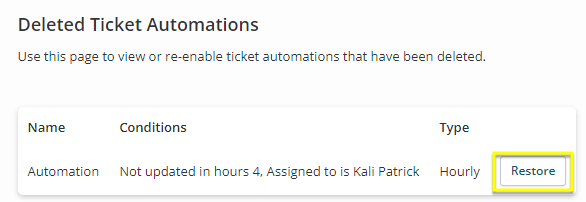
A list of your Deleted Ticket Automations appears. Click Restore next to the one you’d like to restore:
The Ticket Automation table displays containing the one you restored.