
Configure SSO with Microsoft Entra ID (Azure AD)
Table of Contents
This document provides the specific steps required to integrate Microsoft Entra ID (formerly Azure AD) as your identity provider for Syncro. It covers app registration, credential retrieval, and URL setup, as well as instructions for testing and account-wide enforcement.
Note: This document describes SSO specifically for Syncro Users (Technicians and Admins) logging into their Syncro account. It does not apply to your Customer Organizations or their End Users. See Configure the End User Portal for SSO for those details.
Register Syncro in Microsoft Entra ID
Follow these steps:
- Launch your Azure Instance, then click the Microsoft Entra ID pyramid logo:

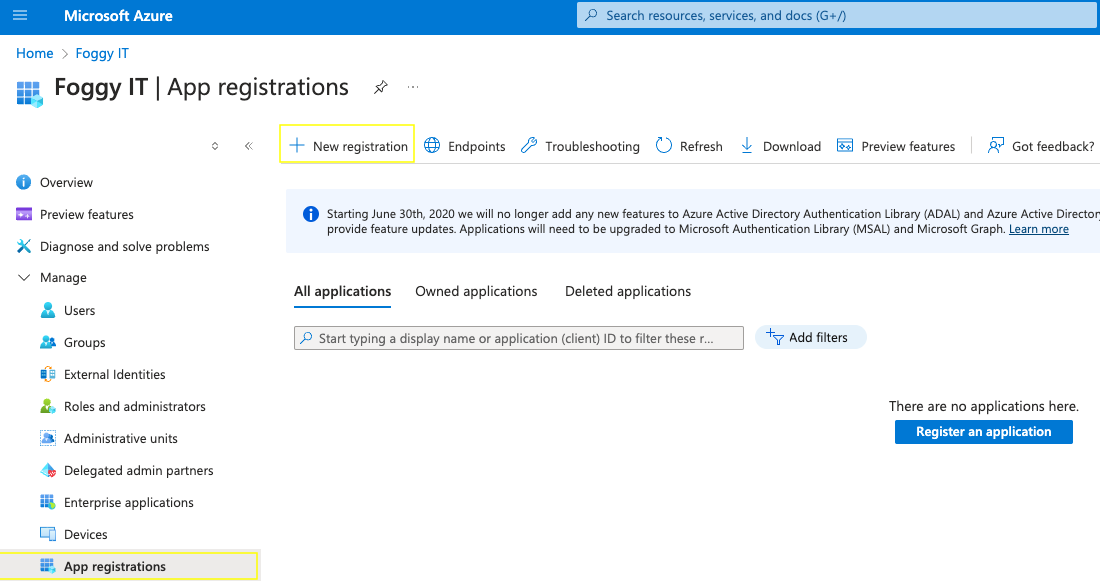
- In Entra's left navigation, select “App Registrations" from the Manage section, then click + New Registration:
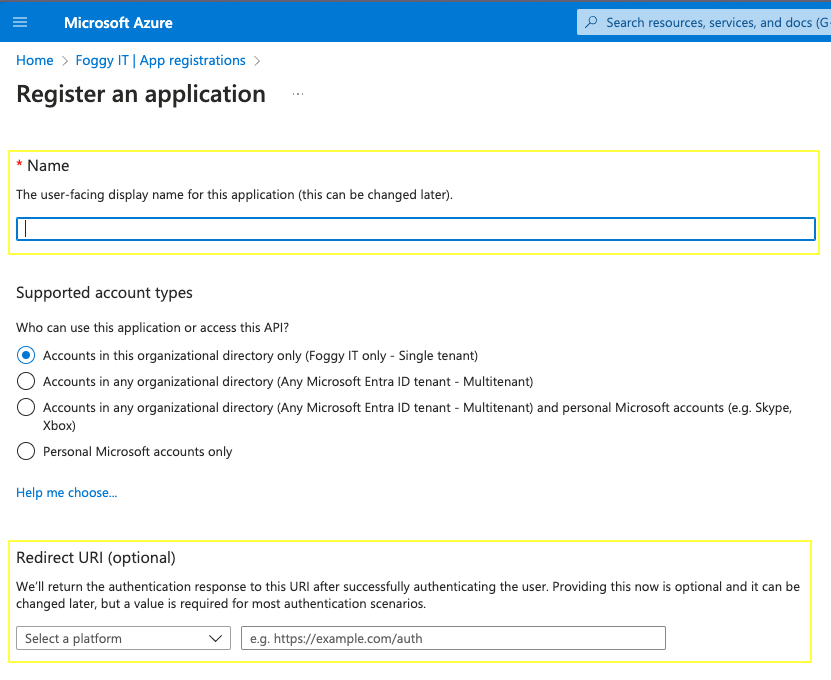
- On the Register an Application page:
- Enter a name for the App so you can identify it later (e.g., “Syncro,” “SyncroMSP,” or whatever you’d prefer).
- In the Redirect URI area, select “Web” from the Platform dropdown menu.
- Copy the Redirect URI from Syncro and paste it into the "Redirect (callback) URL" field in Entra:
Note: Navigate to Admin > Syncro Administration - Login Settings and you'll find it in the “Single Sign On with OpenID Connect” section field:
- Back in Entra, click Save. Entra navigates you to the App’s details page, which displays several strings.
- Copy the “Application (Client) ID” string from Entra and paste it into the “Client ID” field in Syncro:

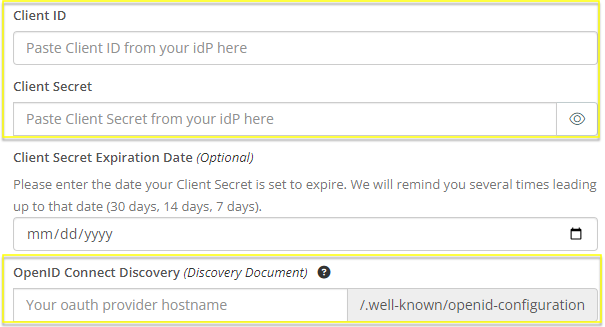
Note: The screen above highlights additional fields you'll need to provide Entra strings for in later steps. - In Entra's left navigation, select “Certificates & Secrets" from the Manage section, then click + New Client Secret:
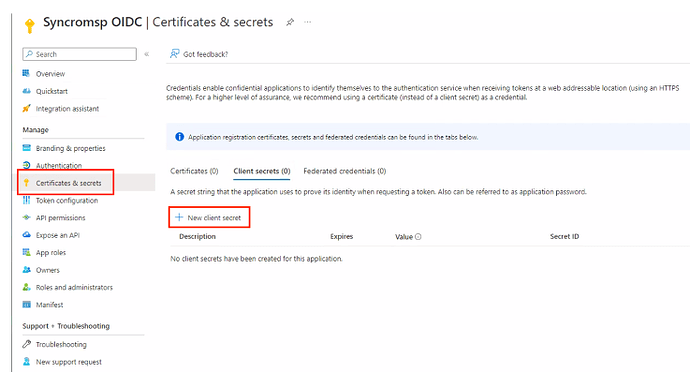
Entra displays the “Add A Client Secret” side panel:
- In the Description field, enter a name for the Secret that you'll use to manage it later.
- Use the Expires dropdown to choose a expiration for the secret key. Entra generates a set of Secret keys.
- Copy the “Value” string from Entra and paste it into Syncro's “Client Secret” field (shown on the screen in step 5):
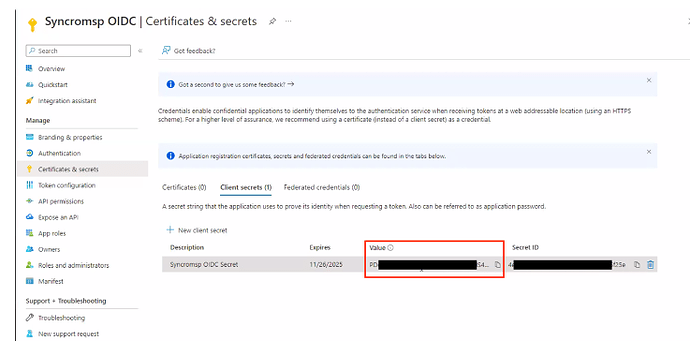
Note: If you copy the “Secret ID” field here instead, you'll get an authorization error.
- In Entra's left navigation, select “Overview”, then “Endpoints:”
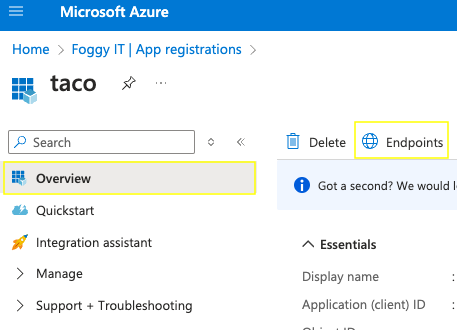
Entra displays the “Endpoints” side panel and a group of fields.
Configure and Enable SSO in Syncro
- Copy the contents of the “OpenID Connect Metadata Document” field into Syncro's “OpenID Connect Discovery (Discovery Document)” field (shown on the screen in step 5):
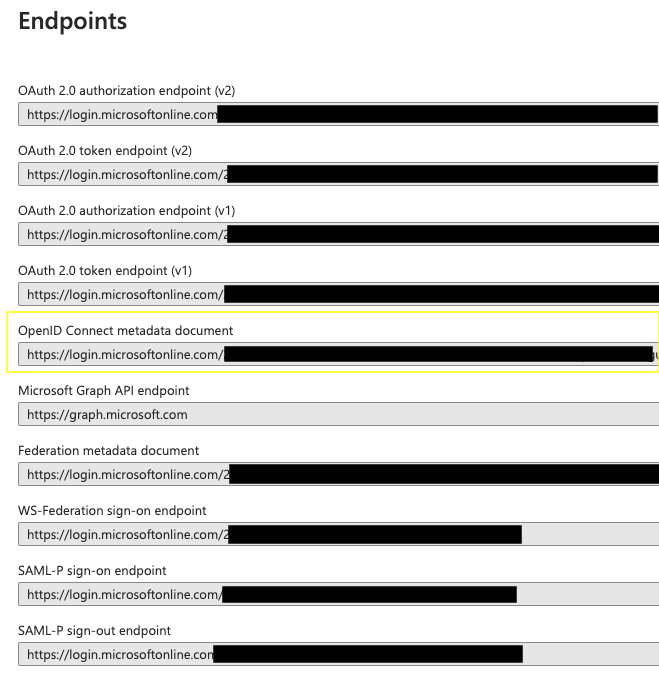
Tip: Don’t worry about cleaning up the URL; Syncro parses the URL string for you.
- In Syncro, click Save & Verify SSO.
Tips:
- If you receive the error message: OpenID Connect Discovery: is invalid, this means that the URL for the OpenID Connect Discovery field is not correct.
- If you receive the error message: SSO configuration contains errors. Please check and verify again., this refers to the Client Secret not being correct. This can happen when a copy/paste includes junk data from the clipboard. Syncro recommends going back to the IdP and trying to copy/paste again.
- Once the connection has been validated you can click Enable SSO to toggle it on. Remember to click Save.